Minnie Mouse Cake with Marshmallow Fondant
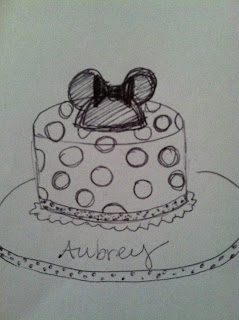
This was the vision I had for Aubrey's 2nd...2nd birthday cake...yes I made her two separate cakes for her two little get togethers. I have way too much fun making cakes :) This cake was a little more involved than my other Minnie Mouse cake, you can see how I made that one here. But it basically came out exactly how I wanted it to and I couldn't be happier!
To start I made a whole batch of white cake pops with my cake pop maker. Aubrey was happy to steal as many as she could. And I let her... because, well it is her birthday.

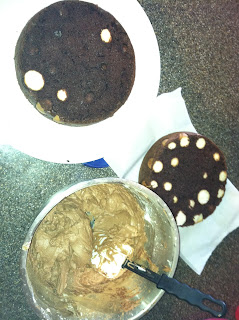
Next I made a chocolate cake in two 9" round pans putting a little batter on the bottom of the prepared pan and placing the white cake pops all over the bottom almost touching each other. I was only able to do one layer but if you have enough batter to cover them in two layers...layer it up! Then cover the pops with the rest of the chocolate batter. Bake as usual. Then using a cake leveler I cut the tops off.. this is what they looked like.
Then I made Wilton's chocolate buttercream frosting adding a little extra milk and about 4 T cocoa powder rather than the 3/4 cup it asks for so it wasn't quite as dark and a little smoother for spreading.
I spread it between the cake layers and around the cake as you normally would for a crumb coating since we're going to be putting fondant on it. Put the cake in the fridge while I made the marshmallow fondant.
Here are a few pictures of the cute birthday girl!
You can find the shirt I got for her here along with TONS of other cute designs for basically anything you can have embroidered she's got it :)

For the fondant I used this recipe from mycrazyblessedlife.com. It had it's pros and cons.. it was a little stiff to work with but stayed softer for much longer.. I might have added a little too much powdered sugar or something but I would definitely use this recipe again! All you need is powdered sugar, marshmallows and water, it's pretty sticky until you have all the powdered sugar in there so if you don't want a mess stick with the store bought stuff. But everyone said they liked this recipe better than the Wilton premade fondant. It's definitely worth a try and you decide if you like it or not.
Moving on... So I colored the marshmallow fondant red, which took a while and a lot of dye! Then I rolled it out and put it on the cake. I had some premade white fondant I needed to use from a previous project and that's what I made the polka dots out of cutting them out with a cookie cutter. I used a little bit of water to adhere the polka dots to the cake.
Next I made the Minnie ears and head. I used the same method as in my Minnie Mouse Chocolate Bundt Cake, because these cakes were made within a day of each other I actually used the same batch. I adapted this recipe from here.1 whole container of crushed up Oreos (using a food processor cream and all) 3/4 of a bag of miniature marshmallows
4 T of butter
Put the marshmallows and butter in a microwave safe bowl and heat for about 45 seconds, stir, and heat until it is all melted and smooth. Add oreos... it's a little hard to stir so thankfully I had my husband there. Next I rolled out the oreo mixture and used a circle cookie cutter to cut the ears out and pressed the rest of the Oreos into a small bowl for the half circle. Using melting chocolate I "glued" candy sticks to the back of the ears and pushed the sticks into the half circle.
You can see in the picture below how much chocolate I used, it probably wasn't necessary but I wanted to be sure! haha.. And really I think if you can make your oreo ears thick enough you could probably push the candy stick into it without using the chocolate on the back but I rolled mine out too thin and was too rushed to change it.
For the bow I just drew a template of what I thought Minnie's bow looked
like. If I would have had ink in the printer I would have printed one
out so they aren't perfect but like I said, it wasn't a big deal.
I melted Wilton red melting chocolate and put it in a condiment bottle.
Then I put the template bow under parchment paper and traced the bow. I
made three just in case they ended up breaking easily.. I'm happy to say
not one broke. After outlining the bow fill it in. You have to work
kind of quick because you have to put the sprinkle pearls on for the
polka dots before the chocolate sets. After the sprinkles were on and
the chocolate has set I went around the outline again to make the edges
pop out.
When the chocolate is completely set turn the bows over and put plenty
of chocolate in the middle, lay a candy stick in the chocolate and cover
the top of the stick with more chocolate. I put my bows on a cookie
sheet and into the freezer because I'm impatient and wanted them to set
up quicker but they will do it at room temperature too.
Next I colored my leftover chocolate frosting black and using about an 11 round tip piped little dots around the base of the cake and the base of the Minnie head.
Then using the red melting chocolate I looked up a Disney font and copied the letters for her name onto some parchment paper. I did two of each letter because they're pretty fragile.
And here are the polka dots inside of the cake! I kind of wish I would have done red frosting between the layers of cake but I wasn't about to make a whole batch of white frosting for one layer... if someone was paying me I would have.
I was a little worried about the chocolate and white cake together and what it would taste like but it was actually awesome! I wish I had some right now ;) Good thing Annalee's bday is coming up soon! Tinkerbell cake here we come!
 |
| My mom found those adorable black and white polka dotted candles that were perfect! It's definitely my favorite cake to date! |


Comments
Post a Comment